Contents:
Intuitive Shipping's SmartBoxing packing algorithm gives you the most accurate carrier shipping rates at checkout, saving you time and money and reducing waste.
How It Works
SmartBoxing is an advanced packaging feature that optimizes your dimensional shipping. Our proprietary packing algorithm calculates the most efficient packing method available by comparing the dimensions and weights of the products in the cart with available package sizes, then selects the optimal package set for the order. Our system sends the packing information to the carrier for live rate calculations.
SmartBoxing doesn't calculate dimensional weight. It optimizes actual size and weight so the carrier’s dimensional weight calculation is as accurate as possible.
When a customer completes their purchase, Intuitive Shipping sends the packing information to either the Order Details or Notes section of the order. You can choose your preference by updating your General settings.
 Package information is only available on Shopify. Learn more about updating General settings.
SmartBoxing takes the guesswork out of packing during fulfillment and ensures that the real-time rates being returned by your preferred carrier services are as accurate as possible.
You can use SmartBoxing to determine accurate packing for all of your products, or some of your products. If there are products that can’t use - or don’t require - SmartBoxing, we recommend setting up multiple Scenarios, then blending the shipping methods using rate blending.
SmartBoxing is intended for shipping methods that calculate live carrier rates, such as parcel service shipping methods.
Learn more about blended rates and parcel service shipping methods.
SmartBoxing may be advanced, but setting it up is straightforward. As long as the products you want to use with SmartBoxing have phystical attributes added in Intuitive Shipping, and your commonly used packages are set up in the app, you’re ready to start using it. There's nothing to turn on. Simply create a shipping method that uses the SmartBoxing packing algorithm!
Add Physical Attributes
Make sure that all products requiring SmartBoxing have dimensions and weights. You can add these physical attributes to products individually or in bulk using a CSV file.
Intuitive Shipping requires specific values for length, width, and height to calculate dimensional volume for SmartBoxing. These dimensions must reflect the shipping size of the product - either the packed size, such a folded t-shirt, or the size of its individual package, such as a branded gift box.
You can enter product dimensions and weights directly into your Intuitive Shipping settings, even if your eCommerce platform already has physical attribute fields. If the values in Intuitive Shipping differ from those in your platform’s product settings, the physical settings entered in Intuitive Shipping will override those values.
Shopify does not currently provide fields for product length, width, or height. If you’re using Shopify and plan to use SmartBoxing, you must enter product dimensions directly into Intuitive Shipping.
BigCommerce has fields for product length, width, and height. If you’re using BigCommerce with SmartBoxing, the product dimensions you enter in Intuitive Shipping will override any values stored in BigCommerce if they're different.
Learn how to add dimensions to products.
Add Packages
Packages can be added to Intuitive Shipping manually or imported in bulk. There is no limit to the number of packages you can add to app.
Once added to Intuitive Shipping, packages can be enabled in any shipping method that uses the SmartBoxing packing algorithm. You'll find them listed in the 'Packages' section of parcel service, freight service, or integrated service shipping methods. Simply select the packages you want SmartBoxing to use in each applicable shipping method.
Learn how to add packages.
Create A Shipping Method With SmartBoxing
Once you've added physical attributes and packages to Intuitive Shipping, you can create a shipping method that uses the SmartBoxing packing algorithm.
For this example, we're creating a parcel service service shipping method, which can calculate real-time rates using your direct account with carriers such as FedEx, UPS, Austalia Post, Canada Post and USPS, but the process is essentially the same if you're setting up a freight service shipping method (FedEx Freight LTL) or an integrated shipping method (ShipStation, Starshipit, Easyship).
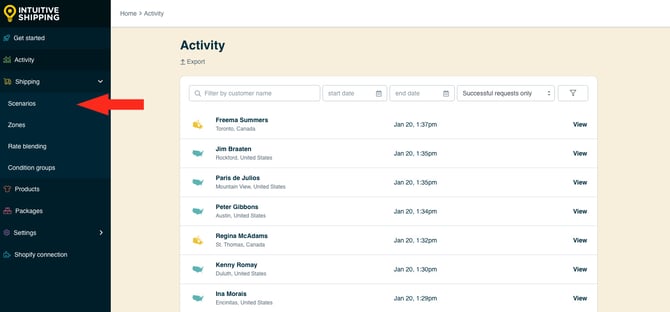
1. Click Shipping on the sidebar menu, then select Scenarios from the drop-down list.


Learn how to create a Scenario.
3. Scroll to the bottom, then click the Create shipping method button.

Select A Parcel Service
1. Click the downward arrow beside ‘Parcel services’ to display a list of live rate carriers. Alternatively, you can select a Freight service or Integrated service - both work with SmartBoxing.

2. Select a carrier from the list.

3. Click the Next button.

4. Select a zone. If you have a lot of zones, type the zone name into the search field to narrow the list.

Learn more about zones.
5. Click the Configure shipping button.

General
1. Enter a shipping method title.

Depending on the option you choose in the next step, this title may or may not be shown to customers at checkout.
2. Select the title type.

You have two (2) settings to choose from:
- Service title provided by carrier - The service title (or titles) returned by the carrier during rate calculation will be the shipping method title(s) displayed at checkout. This is the default setting.
- Use the shipping method title - The shipping method title entered in the previous step will be displayed at checkout. If multiple carrier service options are selected, all of the service titles provided by the carrier are replaced with the shipping method title.
Service title provided by carrier: If the carrier returns multiple titles, such as ‘Canada Post Expedited Parcel’ and ‘Canada Post Priority’, each unique title is displayed at checkout as it is provided by the carrier, regardless of the shipping method title entered in the previous step.
Use the shipping method title: If you entered 'Canada Post' as the shipping method title in the previous step, both carrier titles - 'Canada Post Expedited Parcel' and 'Canada Post Priority' will be displayed as 'Canada Post'
In Shopify, if multiple shipping methods share an identical title, only the cheapest one appears at checkout. To offer multiple carrier service options from a single shipping method, we strongly recommend using the carrier’s service titles.
3. Choose the shipping method status.

You have three (3) settings to choose from:
- Off - when Scenario conditions are met, the shipping method will be ignored and will not display rates, even in Sandbox mode.
- Test - when Scenario conditions are met, the shipping method will be displayed at checkout only when using ‘Intuitive’ on the checkout page (see below).
- On - when Scenario conditions are met, the shipping method will be displayed at checkout. This is the default setting.
When using the 'Test' setting:
- For Shopify - enter ‘Intuitive’ as either the customer’s first or last name.
- For BigCommerce or Shopify B2B - enter ‘Intuitive’ in the optional address field for ‘Apartment/ Suite/ Building’.
While in Sandbox mode, the 'On' setting behaves the same as 'Test' until a billing plan is selected. Learn more about how to test your Intuitive Shipping setup.
4. If desired, enter a description. We recommend limiting your description to 90 characters or less to ensure it displays properly on the checkout page.

Descriptions are displayed below the shipping method title at checkout.

Additional Display Settings
Additional display settings are available for custom delivery times, order processing time and service codes.
- Delivery times are displayed at checkout and help manage expectations for customers.
- Order processing time lets you add buffer time to start the fulfillment process, if the products can't be packaged, picked or completed the same day the order is received.
- Service codes are not displayed to customers, but get pushed to your fulfilment service, if applicable, once a checkout is successfully completed.
Learn more about additional display settings for parcel service shipping methods.
Packages
You can control how the customer’s order is packaged by choosing a packing algorithm and assigning the packages you want this shipping method to use.
1. Select the SmartBoxing packing algorithm.

Additional Packing Settings
Additional packing settings are available for packing method, multiple package blending and product dimensions.
- Packing method lets you choose if different products in the order are packed together or separately.
- Multiple package blending gives you the option blend shipping costs for different packages when carrier services don't match.
- Product dimensions can be used to limit packing when the packing algorithm doesn't otherwise consider dimensions, such as weight-based.
Learn more about additional packing settings for parcel service shipping methods.
Add Packages
If you didn't add packages through the Package management system, or if you need to add more, you can add them directly from the shipping method. Any new packages you add will also be saved to your central package settings, so they’re available for other shipping methods that use packages.
Please note: Packages can only be added from the shipping method individually. To add packages in bulk using a CSV file, you'll need to use the package management system.
Learn more about adding packages from a parcel service shipping method.
Select Packages
All packages you’ve added to Intuitive Shipping are listed in the shipping method. Only the ones with a checkmark next to them will be used by SmartBoxing during carrier rate calculations.
1. To make all of your packages available, check the box next to 'Custom Packages', which behaves like a ‘select all’ feature.

2. If you don’t want to use all packages, check the boxes next to the ones you do want. If you have a long list, you can use the search bar or scroll to find specific packages.

Packages that aren't selected will be ignored by SmartBoxing.

Packages that have been turned off in the package management system appear muted and show a ‘Package not available’ message. They will be ignored by SmartBoxing, regardless of whether their checkbox is selected.

Learn how to change the On/Off status of a package in the package management system.
Shipping Origin
Carrier rates can be calculated using the primary location set up in your eCommerce platform or a custom location saved in Intuitive Shipping. This is useful if you ship products from different retail or warehouse locations.
1. Select the ship from location for the shipping method.

You have two (2) settings to choose from:
- Dynamic origin location - carrier rates for the shipping method will be calculated based on the distance between the customer’s address and your primary eCommerce platform address. This is the default setting.
- Specify origin location - carrier rates for the shipping method will be calculated based on the address specified in the next step.
Add And Select A Custom Origin Location
All custom locations saved in the Location management system are listed in this section of the shipping method. If needed, you can add more origin locations directly from here. Any new origin locations you add will also be saved to your central locations settings, so they’re available for other shipping methods that use custom locations.
Learn more about the Location management system or how to add locations directly from a parcel service shipping method.
1. If you chose 'Specify origin location' in the previous step, select a location. This location will be used as the starting point for carrier rate calculations in this shipping method.

Intuitive Shipping cannot see inventory and doesn’t use inventory-based rules. Locations are used to improve the accuracy of carrier calculations when shipping from multiple warehouse locations.
Account
If you have an account with the carrier you selected at the start of this guide, you can use it to access your discounted or negotiated rates. If you’ve already connected your carrier account to Intuitive Shipping, it will appear under 'Carrier accounts' as a selectable option.
Some carriers also offer standard retail rates, which are available to anyone without needing an account. If the selected carrier provides retail rates, a ‘Standard retail rates’ option will appear under 'Carrier accounts' and be selected by default. If the carrier doesn’t offer retail rates, no option will be shown.
 If the carrier requires an account and no ‘Standard retail rates’ option is available, you will be unable to save the shipping method unless a valid carrier account is available and selected.
Carrier accounts saved in the Carrier accounts management system are listed in this section of the shipping method. If needed, you can add a carrier account directly from here. Any new carrier account you add will also be saved to your central carrier accounts settings, so they’re available for other shipping methods that use the same account.
Select A Carrier Account
1. Select a carrier account or use standard retail rates, if available.

Services
Carriers usually offer a range of delivery services, both domestic and international. Intuitive Shipping supports most services provided by our integrated carrier partners. If you don’t see a specific carrier service listed in your shipping method, please contact us so we can look into it.
If the shipping method is assigned to a domestic zone, make sure to select domestic services. If it’s assigned to an international zone, select international services instead.
1. Select all services within a region by checking the box beside the region heading.

2. If you don’t want to offer all services, check the boxes next to the ones you do want.

Selected services must be available in the customer’s location to be displayed at checkout.
Let’s say you’ve selected Canada Post Expedited Parcel, Regular Parcel and Priority. If a customer lives at an address where Priority is not offered by Canada Post, they will only see Expedited and Regular services as shipping options at checkout.
Additional Service Settings
Additional settings are available to filter services. By default, each service you selected in the steps above is displayed at checkout if it's available in the customer's postal code or ZIP code. You can choose to limit which services are offered based on their cost or estimated delivery time.
Learn more about additional service settings.
Optional Settings
Optional settings for carrier settings, fallback rating, cost adjustments, free shipping, custom shipping blending and rate blending give you further control of your carrier shipping rates at checkout. These settings are not required.
- Carrier settings provide additional controls, such as address type (residential or commercial) and package insurance, allowing you to match the settings used at the fulfillment stage.
- Carrier service fallback rating can be enabled to ensure your customers receives a shipping rate at checkout even when rate request times out.
- Cost adjustments let you fully customize the final cost presented at checkout, regardless of the original rate calculation.
- Free shipping allows you to set a threshold for when free shipping is applicable on carts that would otherwise be charged for shipping.
- Custom shipping blending gives you the option to blend rates from the shipping method with product-specific shipping costs.
- Rate blending lets you combine rates from one shipping method with other shipping methods using simple or advanced blending.
Carrier settings are not available for all carriers. Learn more about Optional settings for parcel service shipping methods.