A great way to promote local business is to give your customers the option to pick up their order in-store or curbside for free. This guide will show you how to add a local ‘click & collect’ pickup option to your store using any of a few different ways to limit it to your local area.
How It Works
Here are three different ways to set up your local pickup option, depending on your preference.
City Condition
This method requires you to create a new Scenario that includes a ‘city’ customer condition limiting when free pickup is available. Within the Scenario, you’ll need to create a free shipping method (we’re assuming you won’t be charging local customers who pick up their orders). You can add paid shipping methods as well if you want customers to have the option to choose between free pickup and paid delivery.
This setup works well if you want to restrict curbside pickup to an entire city or a cluster of cities.
Postal Code/ ZIP Code Subzone
You could complete a similar setup to the ‘city’ method using a ‘postal code/zip code’ customer condition instead. However, we recommend creating a subzone that includes any postal codes or ZIP codes eligible for local pickup. This lets you create a free shipping method within any existing Scenarios and assign it directly to the subzone. If desired, you can copy your existing paid shipping methods to the local subzone (or add new ones), giving customers the option to choose between free pickup and paid delivery.
The subzone method eliminates the need for a stand-alone ‘local pickup’ Scenario and is ideal when city limits aren’t sufficient for limiting eligibility.

Learn more about subzones.
Distance
This method adds a local delivery shipping method - which measures the distance between the customer’s address and your store location - to your existing Scenarios. The paid options in those Scenarios will be displayed to local customers along with the local pickup option. However, customers outside your local pickup radius will only see the paid delivery options.
This process also eliminates the need for a stand-alone ‘curbside’ Scenario and works well when you can’t rely on city limits or postal code borders to restrict your pickup zone.
Please note: This method requires a Google API account.
Learn more about creating and connecting a Google API account.
Create A Local Pickup Option For Cities
This setup requires a new Scenario just for your local pickup option. It uses a ‘city’ customer condition to control when local pickup is shown at checkout. If you want customers in your local pickup area to see both paid delivery and a free pickup option, there’s no need to make changes to your existing paid Scenarios.
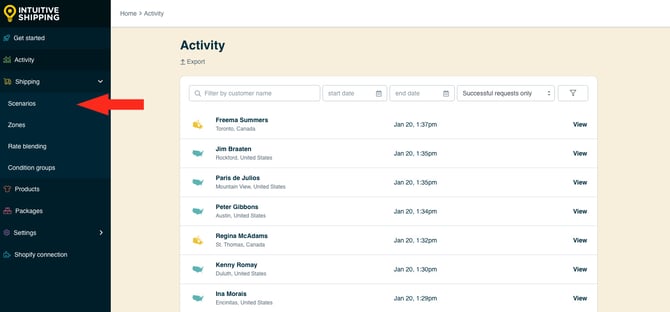
1. Click Shipping on the sidebar menu, then select Scenarios from the drop-down list.
2. Click the Create scenario button.

General Settings
1. Enter a Scenario title, like ‘Local Pickup - Toronto’.

2. Leave the Scenario status set to On.

Conditions
1. Select Set restrictions.

2. Leave Condition match set to All conditions.

3. Select the City condition type.

4. Leave the condition logic set to 'equals', since we want customers from the city (or cities) entered in Step 5 to get the local pickup option. If you prefer to prevent customers from certain cities from getting local pickup, you would use 'does not equal'.

5. Enter the city name as the condition value. If desired, you can add multiple city names, separated by comma.

If you want to restrict multiple cities, add them to the same condition value field separated by comma, using the same condition row. For example:
- City equals 'Toronto, Missisauga, Oakville’.
Customers from any of these cities will meet the condition. If you add multiple rows, each one with its own city name - and Condition match is set to 'All conditions', customers will be unable to check out because the their address would need to include all of the city names, which is impossible.
Save Your Settings
1. Click the Save button to save your local pickup Scenario.

New Scenarios must be saved before a shipping method can be added. Scenarios must have at least one shipping method assigned to them for conditions work.
Create A Free Shipping Method
These steps will show you how to configure a free shipping method that will be displayed at checkout when customer orders satisfy the 'city' condition. We'll show you how to use the shipping method title and, if necessary, the description, to clarify that it's a 'pickup' option rather than a delivery option.
1. Click the Create shipping method button.

Select Free Shipping
1. Select Free shipping from 'Custom services'.

2. Click the Next button at the bottom of the pop-up.

3. Select a Zone. If you have a lot of zones, type the zone name into the search field to narrow the list. You must select the zone that includes the city (or cities) from your Scenario condition.

Learn more about zones.
5. Click the Configure shipping button.

General
1. Enter a shipping method title, like ‘Local pickup' or 'Curbside pickup'. This will help customers understand that it isn't a delivery option.

Shipping method titles are visible to customers at checkout.
2. Leave the shipping method status set to 'On'.

3. If desired, enter a description, such as 'Call to arrange a pickup time'. This will let your customers know that action is required to complete their purchase. We recommend limiting your description to 90 characters or less to ensure it displays properly on the checkout page.

Descriptions are displayed below the shipping method title at checkout.

Additional Display Settings
- Delivery times - or in this case, 'pickup' times - are displayed at checkout and help manage expectations for customers.
- Service codes are not displayed to customers, but get pushed to your fulfilment service, if applicable) once a checkout is successfully completed.
If you don't require custom delivery times or service codes, skip ahead to Free Shipping Threshold.
If you require delivery times - in this case, 'pickup' times - and service codes:
1. Click Show additional display settings.

2. Enter a custom delivery (pickup) time in days.

- Min delivery time - the lower limit of the delivery time range.
- Max delivery time - the upper limit of the delivery time range.
Number of days: Enter a number in either 'Min' or 'Max and leave the other field blank. For example, to display delivery time as '3 business days', enter '3' in 'Min' and leave the 'Max' field blank (or vice versa).
Range of days: Enter different numbers in each field. For example, to display delivery time as '3 to 5 business days', enter '3' in 'Min' and enter '5' in 'Max'.
Delivery times are displayed below the shipping method title at checkout.

3. Enter a service code, such as ‘LOCAL’ or 'CURBSIDE'. The service code is pushed to your fulfillment service (if applicable) when a customer successfully completes their checkout.

Service codes are not visible to customers.
Free Shipping Threshold
The free shipping method - or in this case, free pickup method - applies to any order that meets the parent Scenario’s 'city' condition. However, you can limit when free local pickup is available by setting a threshold. When a threshold is enabled, customers whose orders don’t meet the requirement won’t be able to check out - even if their city qualifies them for local pickup. If this is the outcome you want, we recommend mentioning any purchase limits to curbside pickup on your store’s shipping page to help manage customer expectations.
If you have other Scenarios with paid shipping options, local customers whose orders don’t qualify for free local pickup would still see paid delivery options at checkout.
If your free shipping (free pickup) method doesn't require a threshold, skip ahead to Optional Settings.
To limit when your free local pickup option is offered:
1. Choose Set a free shipping threshold.

2. Select a free shipping threshold type.

You have three (3) settings to choose from:
- Total - free pickup will activate based on the combined value of items in the cart.
- Quantity - free pickup will activate based on the combined number of items in the cart.
- Weight - free pickup will activate based on the combined weight of items in the cart.
3. Select the free shipping threshold logic.

You have six (6) settings to choose from:
- Greater than - free pickup will activate when the combined cart value is more than the value entered in the next step.
- Greater than or equals - free pickup will activate when the combined cart value is more than or the same as the value entered in the next step.
- Less than - free pickup will activate when the combined cart value is lower than the value entered in the next step.
- Less than or equals - free pickup will activate when the combined cart value is lower than or the same as the value entered in the next step.
- Equals - free pickup will activate when the combined cart value is exactly the same as the value entered in the next step.
- Does not equal - free pickup will activate when the combined cart value is anything except the value entered in the next step.
4. Enter the free shipping threshold value. Free pickup will activate when the cart value exceeds the value entered here, based on the settings in the previous two steps.

The unit of measure for the threshold value is based on the free shipping threshold type selected.
Optional Settings
Optional settings for custom shipping blending and rate blending give you further control of your custom shipping rates at checkout. These settings are not required for this setup.
Save Your Settings
1. Click the Save button to save your local pickup 'shipping' method.

Create A Local Pickup Option With Subzones
This setup will show you how to create a subzone using postal codes or ZIP codes, which you can use with any of your existing Scenarios that include paid shipping methods. Simply add a new free shipping method - or in this case, a free pickup method - to your Scenarios and assign it to the subzone.
Once you’ve set up a free pickup method in your local subzone, you can copy any existing paid shipping methods to the same subzone or add new ones.
1. Click Shipping on the main menu, then select Zones from the drop-down list.

2. Click Edit next to the zone where you want to add a subzone.

3. Scroll down to the Subzones section, then click Add subzone.

4. Enter a subzone title. We recommend naming your subzone after the district it covers, like 'Midtown' or 'Highlands', or by simply calling it 'Local pickup'.

Subzone titles are not visible to customers.
5. Leave the subzone status set to 'On'.

6. Enter the postal codes, postal code prefixes or postal code ranges to be included in your subzone. Be sure to use correct formatting.

Learn more about postal code and ZIP code formatting.
7. Select the postal code type.

You have two (2) settings to choose from:
- Standard - any postal code or ZIP code that is not in the UK.
- United Kingdom - UK postcodes only.
The UK uses a unique postcode format that requires Intuitive Shipping to perform a special lookup to verify the postcode is entered correctly.
8. Click the Save button to save your subzone.

Once saved, Subzones are automatically added to the parent zone. You are not required to save the parent zone as well - unless you made other changes to it.
We recommend limiting your local pickup postal codes or ZIP codes to one subzone. However, you can split them into multiple subzones if desired by repeating the above steps. If you create multiple subzones for local pickup, be sure to add a free shipping (free pickup) method to each zone.
Create A Free Shipping Method
These steps will show you how to configure a free shipping method that you'll need to assign to the subzone you created in the previous section. It will be displayed at checkout when customer postal codes are included in the subzone. We'll show you how to use the shipping method title and, if necessary, the description, to clarify that it's a 'pickup' option rather than a delivery option.
1. Click the Create shipping method button.

Select Free Shipping
1. Select Free shipping from 'Custom services'.
2. Click the Next button at the bottom of the pop-up.
3. Select the subzone you created in the previous section.

5. Click the Configure shipping button.

General
1. Enter a shipping method title, like ‘Local pickup' or 'Curbside pickup'. This will help customers understand that it isn't a delivery option.
Shipping method titles are visible to customers at checkout.
2. Leave the shipping method status set to 'On'.
3. If desired, enter a description, such as 'Call to arrange a pickup time'. This will let your customers know that action is required to complete their purchase. We recommend limiting your description to 90 characters or less to ensure it displays properly on the checkout page.
Descriptions are displayed below the shipping method title at checkout.
Additional Display Settings
- Delivery times - or in this case, 'pickup' times - are displayed at checkout and help manage expectations for customers.
- Service codes are not displayed to customers, but get pushed to your fulfilment service, if applicable) once a checkout is successfully completed.
If you don't require custom delivery times or service codes, skip ahead to Free Shipping Threshold.
If you require delivery times - in this case, 'pickup' times - and service codes:
1. Click Show additional display settings.
2. Enter a custom delivery (pickup) time in days.
- Min delivery time - the lower limit of the delivery time range.
- Max delivery time - the upper limit of the delivery time range.
Number of days: Enter a number in either 'Min' or 'Max and leave the other field blank. For example, to display delivery time as '3 business days', enter '3' in 'Min' and leave the 'Max' field blank (or vice versa).
Range of days: Enter different numbers in each field. For example, to display delivery time as '3 to 5 business days', enter '3' in 'Min' and enter '5' in 'Max'.
Delivery times are displayed below the shipping method title at checkout.
3. Enter a service code, such as ‘LOCAL’ or 'CURBSIDE'. The service code is pushed to your fulfillment service (if applicable) when a customer successfully completes their checkout.
Service codes are not visible to customers.
Free Shipping Threshold
The free shipping method - or in this case, free pickup method - applies to any order that meets the parent Scenario’s conditions, as long as the customer's address is included in the subzone. However, you can further limit when free local pickup is available by setting a threshold. When a threshold is enabled, customers whose orders don’t meet the requirement won’t be able to check out - even if their postal code or ZIP code qualifies them for local pickup. If this is the outcome you want, we recommend mentioning any purchase limits to curbside pickup on your store’s shipping page to help manage customer expectations.
If you want local customers whose orders don’t meet the threshold for free local pickup to see paid delivery options at checkout, you’ll need to copy paid shipping methods from your other zones to the local subzone or add new ones. We'll show you how to do that!
If your free shipping (free pickup) method doesn't require a threshold, skip ahead to Optional Settings.
To limit when your free local pickup option is offered:
1. Choose Set a free shipping threshold.
2. Select a free shipping threshold type.
You have three (3) settings to choose from:
- Total - free pickup will activate based on the combined value of items in the cart.
- Quantity - free pickup will activate based on the combined number of items in the cart.
- Weight - free pickup will activate based on the combined weight of items in the cart.
3. Select the free shipping threshold logic.
You have six (6) settings to choose from:
- Greater than - free pickup will activate when the combined cart value is more than the value entered in the next step.
- Greater than or equals - free pickup will activate when the combined cart value is more than or the same as the value entered in the next step.
- Less than - free pickup will activate when the combined cart value is lower than the value entered in the next step.
- Less than or equals - free pickup will activate when the combined cart value is lower than or the same as the value entered in the next step.
- Equals - free pickup will activate when the combined cart value is exactly the same as the value entered in the next step.
- Does not equal - free pickup will activate when the combined cart value is anything except the value entered in the next step.
4. Enter the free shipping threshold value. Free pickup will activate when the cart value exceeds the value entered here, based on the settings in the previous two steps.
The unit of measure for the threshold value is based on the free shipping threshold type selected.
Optional Settings
Optional settings for custom shipping blending and rate blending give you further control of your custom shipping rates at checkout. These settings are not required for this setup.
Save Your Settings
1. Click the Save button to save your local pickup method.
Add Paid Shipping Methods To Your Subzone
If you want customers in your local pickup subzone to have the option to select paid delivery options as well as free curbside pickup, you’ll need to copy your existing shipping methods to the subzone or create new ones.
To copy an existing shipping method:
1. On the Scenario's 'Edit' page, click Edit beside the paid shipping method you want local customers to see.

2. At the top of shipping method page, click Duplicate below the shipping method heading. This will create an exact copy of the shipping method.

3. Select your local subzone, then click the Duplicate button.


4. Change the shipping method title from ‘Copy of [original title] to something else - or remove 'Copy of' to use the same title as the original.

5. Scroll to the bottom of the page and click the Save button. This will create an exact duplicate of your existing paid shipping method.
6. Repeat Steps 1-5 to copy any additional paid shipping methods to your local pickup subzone.
Customers in your local pickup area will now have the option to select from free local pickup or paid delivery.

7. If you have more than one Scenario, repeat all the steps in this section for each one that you want to include a local pickup option.
Create A Local Pickup Option With Distance
This setup will show you how to create a ‘local delivery’ - or in this case, a local pickup - shipping method that measures distance, which you can use with any of your existing Scenarios that have a paid shipping method. Simply add the new shipping method to your Scenarios and assign it to the zone that includes your local pickup area.
Please note: You must have a Google API account for any distance-based setups to work.
If you have not yet created a Google API account, you will need to do that before continuing.
Learn how to create and connect your Google API account.
To create a local delivery (pickup) shipping method:
1. Click Shipping on the sidebar menu, then select Scenarios from the drop-down list.
2. Click Edit next to the Scenario you want to add the shipping method to. If you haven’t created any Scenarios yet, you’ll need to set one up before continuing.

Learn how to create a Scenario.
3. Scroll down to Shipping rates and services, then click the Create shipping method button.
Select Local Delivery
1. Click the downward arrow beside ‘Local delivery’, then select Local delivery from the drop-down list.

2. Click the Next button at the bottom of the pop-up.

3. Select the zone that includes your local area.
4. Click the Configure shipping button.
General
1. Enter a shipping method title, such as 'Local Pickup' or 'Curbside Pickup'.

Shipping method titles are visible to customers at checkout.
2. Leave the shipping method status set to 'On'.

3. If desired, enter a description, such as 'Call to arrange a pickup time'. This will let your customers know that action is required to complete their purchase. We recommend limiting your description to 90 characters or less to ensure it displays properly on the checkout page.
Descriptions are displayed below the shipping method title at checkout.
Additional Display Settings
1. Click Show additional display settings.
2. Enter a custom delivery time in days.
- Min delivery time - the lower limit of the delivery time range.
- Max delivery time - the upper limit of the delivery time range.
Number of days: Enter a number in either 'Min' or 'Max and leave the other field blank. For example, to display delivery time as '3 business days', enter '3' in 'Min' and leave the 'Max' field blank (or vice versa).
Range of days: Enter different numbers in each field. For example, to display delivery time as '3 to 5 business days', enter '3' in 'Min' and enter '5' in 'Max'.
Delivery times are displayed below the shipping method title at checkout.
3. Enter a service code, such as ‘LOCAL’ or 'CURBSIDE'. The service code is pushed to your fulfillment service (if applicable) when a customer successfully completes their checkout.
Service codes are not visible to customers.
Shipping Origin
Local pickup eligibility can be calculated using the primary location set up in your eCommerce platform or one of any custom locations saved in Intuitive Shipping. This is useful if your pickup location is different than your primary store address.
1. Select the ship from location.

You have two (2) settings to choose from:
- Dynamic origin location - distance for local pickup eligibility will be calculated based on the distance between the customer’s address and your primary eCommerce platform address. This is the default setting.
- Specify origin location - distance for local pickup eligibility will be calculated based on the address specified in the next step.
If you selected 'Dynamic origin location', skip ahead to Shipping Cost.
Add And Select A Custom Origin Location
All custom locations saved in the Location management system are listed in this section of the shipping method. If needed, you can add more origin locations directly from here. Any new origin locations you add will also be saved to your central locations settings, so they’re available for other shipping methods that use custom locations.
The next few steps will show you how to add a custom origin location directly from the shipping method. If the location you need is listed and you don't need to add more, skip ahead to select a location.
To add a location that is not currently listed:
1. Click Add location.

2. Enter a location title, such as ‘Warehouse 2’ or 'Customer Pickup Site'.

Location titles are not visible to customers.
3. Enter the address for the location. A complete address is not required, meaning you don’t have to fill in every field, such as the postal/ZIP code field.

4. Click the Save button.

The newly added location will appear as a selectable option in this shipping method and will also be saved in the Location management system for use in other shipping methods that use locations.
5. Select a location. This location will be used as the starting point for distance-based calculations in this shipping method.

Intuitive Shipping cannot see inventory and doesn’t use inventory-based rules. Locations are used to improve the accuracy of distance calculations when shipping or offering customer pickup from multiple warehouse locations.
Shipping Cost
1. Enter a zero-cost shipping rate.

There are three (3) fields per rate row:
- a - Up to
- b - Cost
- c - Per unit
Only a and b are required. The 'Per unit' field is not required for this setup.
a. Enter the 'Up to' (upper limit) in either miles or kilometers. This is the maximum allowable distance for local pickup. Customers who live outside this radius will not see a local pickup option at checkout.

Distance units are configured in your general settings.
If the 'up to' limit exceeds the range of your zone, customers outside the zone won't see a local pickup option at checkout, even if they're within the distance radius.
Let's say your store is based in Niagara Falls, Ontario - near the Canada/ US border - and you're assigning this 'pickup' shipping method to your 'Ontario' zone. But your 'up to' limit is 75 km and you want American customers from Niagara Falls, New York and surrounding communities to see the local pickup option. Customers outside of Ontario won't see a local pickup option at checkout, even if they live within 75 km of your store. To resolve this, you would need to add this local delivery (pickup) method to the zone that includes the Province of Ontario and the one that includes New York State.
b. Enter a cost of zero (0.00). A cost must be displayed at checkout, even if the customer is picking up their order for free.

 The currency displayed beside the cost (e.g. 'USD') is based on your eCommerce platform's currency settings and cannot be changed within Intuitive Shipping. Currency symbols, such as '$' are not permitted in the cost field.
c. Leave the per unit value blank.

Additional settings are available for cart splitting and rate table blending - they are not required for this setup and can be ignored.
Google API Account
A Google API account is required to complete this setup. Without a connected Google API account, the local delivery shipping method cannot be saved.
If you haven’t created a Google API billing account yet, you’ll need to set one up before continuing.
Learn how to create and connect your Google API account.
Once your API account is ready and you have your API key, return here and complete the steps below.
If you have already connected your Google API account to Intuitive Shipping, skip ahead to select your Google account.
1. Click Add a carrier account.

2. Enter an account title, such a 'Google Distance' or 'Google API'.

Carrier account titles are not visible to customers.
3. Enter your API key

4. Click the Save button.

5. Select your Google API account.

Optional Settings
Optional settings for local delivery, fallback rating, cost adjustments, free shipping, custom shipping blending and rate blending give you further control of your custom shipping rates at checkout. Most of these settings are not required for this setup. However, you may wish to adjust the settings for 'local delivery' and 'carrier service fallback rating'.
- Local delivery settings let you choose if distance calculations will be handled using driving distance (Google Maps) or geocoding (straight line distance - 'as the crow flies').
- Carrier service fallback rating can be enabled to ensure your customers receive the local pickup option at checkout even when there is an error with your Google API account.
If you do not need to adjust the local delivery or fallback rating settings, skip ahead to Save Your Settings.
To configure optional settings:
1. Click Show optional settings.

Local Delivery Settings
Intuitive Shipping uses your Google API key to calculate the distance between your shipping origin location and the customer’s address. This can be done in one of two ways:
Routes API (formerly Distance API): By default, we try to calculate distance using this method, which looks up driving directions through Google Maps.
Geocoding API: If that fails, we try this method, which calculates straight-line distance by converting both addresses into geo-coordinates. You can choose to use either method exclusively if preferred.
The Routes API works in most cases but may fail in regions where postal codes are not used or not recognized by Google Maps. Geocoding API generally succeeds unless an address cannot be converted into coordinates.
Each method uses one API call. If you select 'Automatic', Intuitive Shipping will make one API call about 75% of the time and two calls about 25% of the time.
Google charges $5.00 per 1,000 API calls. A $200 monthly credit covers up to 40,000 calls, which typically supports around 30,000 to 40,000 distance-based rate calculations per month at no cost.
1. Select a distance calculation type.

You have three (3) settings to choose from:
- Automatic - Intuitive Shipping first attempts to calculate distance using your Routes API. If that fails, we attempt to calculate distance using your Geocoding API. This method may result in up to two API calls per checkout to your Google API account. This is the default setting.
- Driving distance - Intuitive Shipping attempts to calculate distance using only your Routes API. This method will result in only one API call per checkout to your Google API account.
- Geocoding - Intuitive Shipping attempts to calculate distance using only your Geocoding API. This method will result in only one API per checkout call to your Google API account.
If you select either Driving distance or Geocoding and the rate calculation fails for any reason, Intuitive Shipping will not fall back to the other method. No rate will be returned to the customer.
Carrier Service Fallback Rate
Intuitive Shipping lets you decide if a fallback rate will be shown at checkout in situations when the Google API call reaches the timeout limit. This is useful when Google's mapping servers are down or when they're overwhelmed during peak periods.
Fallback rates are only activated when the system times out waiting for a response from Google.
The timeout limit is how long Intuitive Shipping has to send rates to your checkout page within your eCommerce platform’s established time limit.
Please note: Because the fallback rate is displayed when the Google API call times out, it isn’t restricted by the customer’s proximity to your local pickup site. That means customers who are not eligible for local pickup may still see the ‘curbside’ option.
For example, if you set an ‘up to’ limit of 75 km, and a customer who lives 120 km away attempts to check out during a Google API timeout, the fallback rate may still display the local pickup option.
If that’s an unacceptable risk, leave ‘Fallback rate’ set to ‘Do not use a fallback rate’. Just keep in mind that if the API call times out, even customers who are eligible for local pickup will not see the pickup option.
To display a fallback local pickup option when the Google API call times out:
1. Select Define a fallback rate.

 Fallback rates will not be displayed if there are rate calculation errors, such as an incorrectly entered address that isn't recognized by Google.
2. Enter a zero-cost fallback shipping cost.

Additional Fallback Rate Display Settings
Additional settings are available for fallback rate titles, descriptions, delivery times and service codes, which can override the shipping method's general display settings when the fallback rate is activated and displayed at checkout. However, since your fallback rate settings should be the same as your main display settings for this setup, adjustable these settings is not required.
Save Your Settings
1. Click the Save button to save your local delivery shipping method:

Customers in your local pickup area will now have the option to select from free local pickup or paid delivery.
