
Contents:
If you ship from multiple locations and your eCommerce platform's default shipping origin isn't suitable for carrier or distance-based shipping rates, you can add custom locations to Intuitive Shipping. These locations can be assigned to individual shipping methods, allowing shipping rates to be calculated from the appropriate ship-from location for greater accuracy.
How It Works
Custom locations can be added to Intuitive Shipping manually or imported from your eCommerce platform. There is no limit to the number of custom locations you can add.
Once added, custom locations can be assigned to any shipping method that calculates real-time carrier rates or local delivery distance. In addition to appearing on the Locations page, each custom location is available in the Shipping origin section of Parcel service, Freight service, Integrated service, and Local delivery shipping methods.
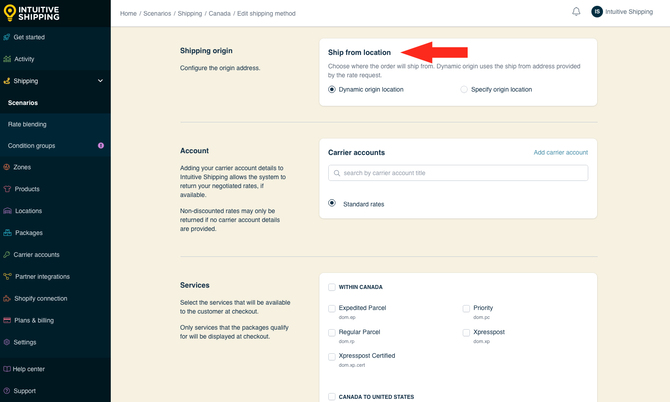
Custom locations can be assigned to any applicable shipping method by selecting Specify origin location, then choosing the appropriate location from the list.
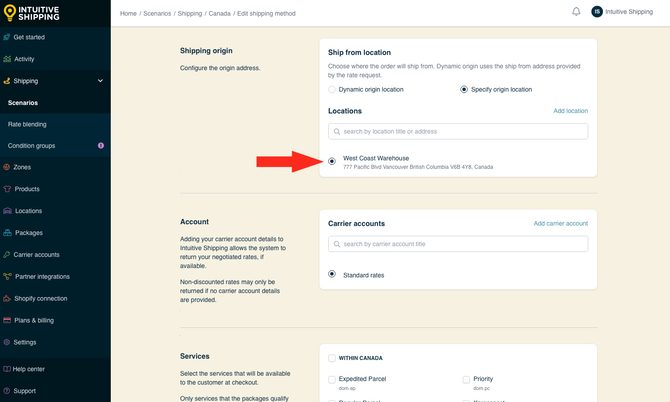
If required, custom locations can also be added directly from within the shipping method.
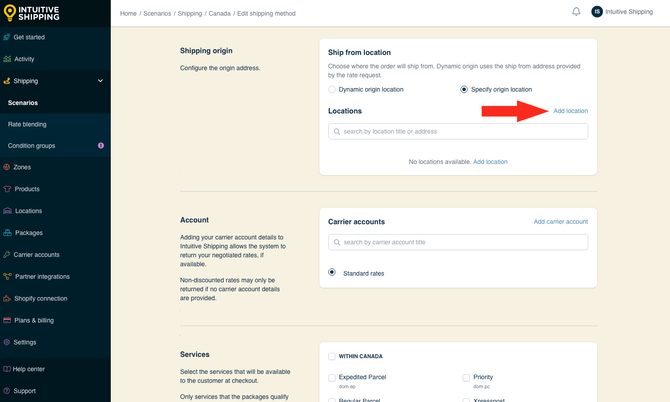
 Locations added directly from a shipping method are also added to the Locations page and can be assigned to any new or existing shipping method.
Inventory Is Not Visible To Intuitive Shipping
Intuitive Shipping doesn't have visibility into your inventory. If you're using Shopify, this means Intuitive Shipping can't see your secondary Shopify locations or the inventory levels at any of your locations.
Skip this setup guide if you're only using Custom service shipping methods, including Free shipping methods, as these methods don't require locations.
Add A Location
These steps will show you how to manually add individual custom locations to Intuitive Shipping's location management system, making them available for use with any applicable shipping method.
If you prefer to import locations from your eCommerce platform, skip ahead to Import Locations.
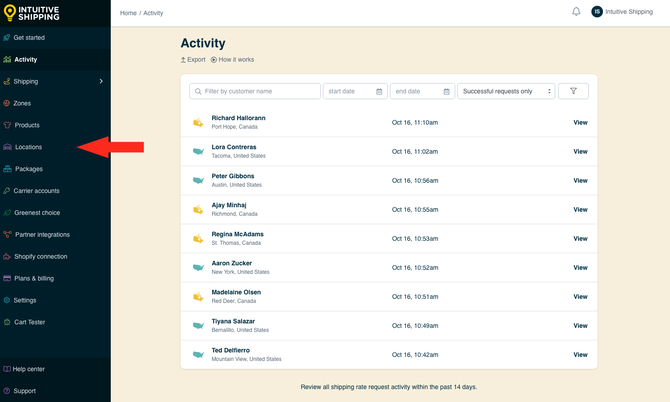
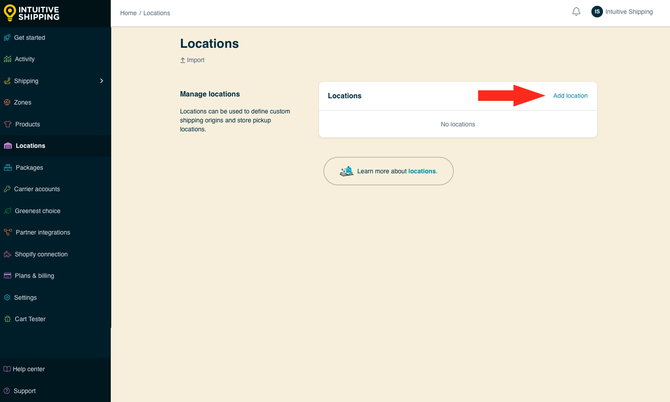
1. Click Locations on the sidebar menu.
2. Click Add location
Location Settings
1. Enter a location title, like ‘Warehouse B’.
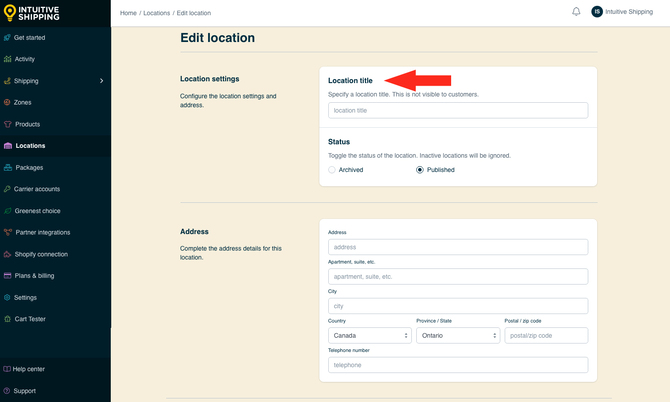
Location titles are not visible to customers.
2. Set the location status.
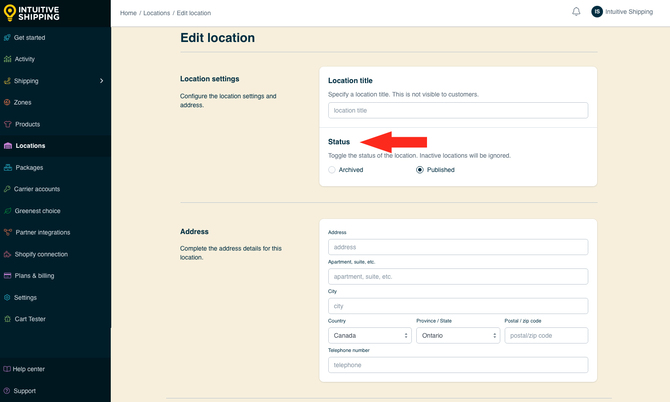
You have two settings to choose from:
- Archived - The location is ignored and hidden by shipping methods it is currently assigned to and cannot be assigned to new shipping methods.
- Published - The location is available and visible in shipping methods it is currently assigned to and can be assigned to new shipping methods. This is the default setting.
Address
1. Enter the location address. If desired, you can also enter a telephone number for the location.
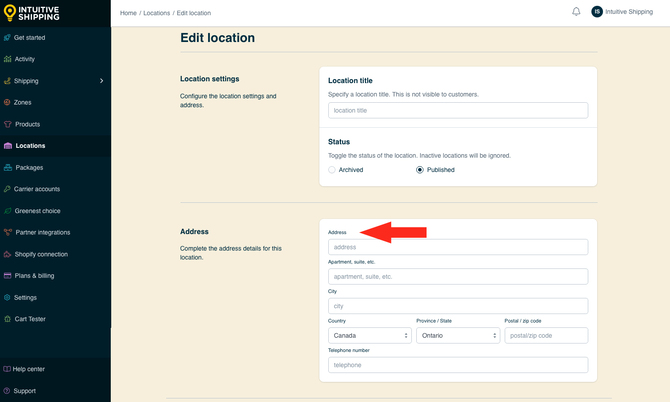
A complete address is not required to save the location. However, some carriers require a complete address to calculate real-time rates.
Save Your Settings
1. Click the Save button to save your custom location.
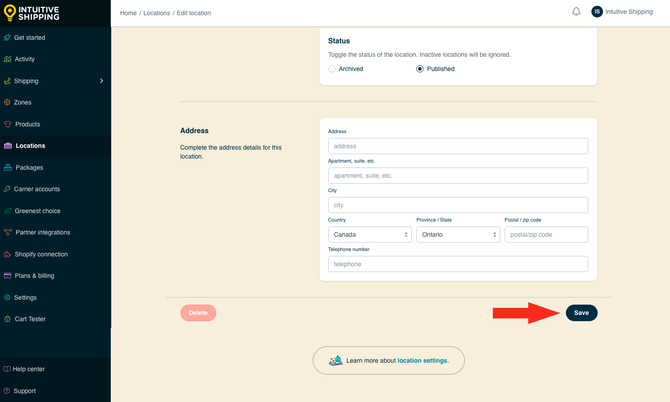
2. Repeat the steps above to manually add more custom locations, or continue to the next section to learn how to quickly import locations from your eCommerce platform. There is no limit to the number of locations you can add to Intuitive Shipping.
Import Locations
These steps will show you how to import locations from your eCommerce platform to Intuitive Shipping's location management system, making them available for any applicable shipping method.
1. Click Locations on the sidebar menu.
2. Click Import.
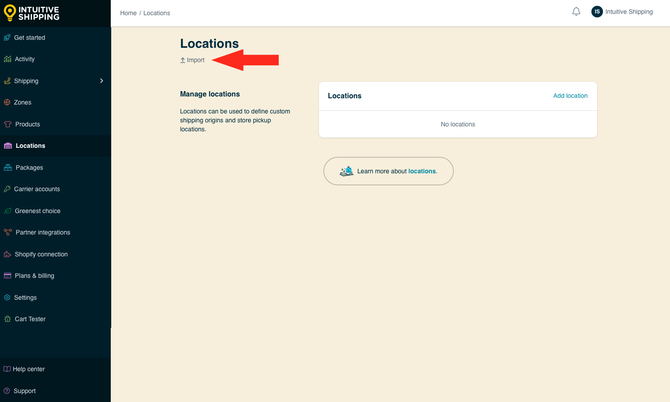
3. Select the locations you wish to import from your eCommerce platform.
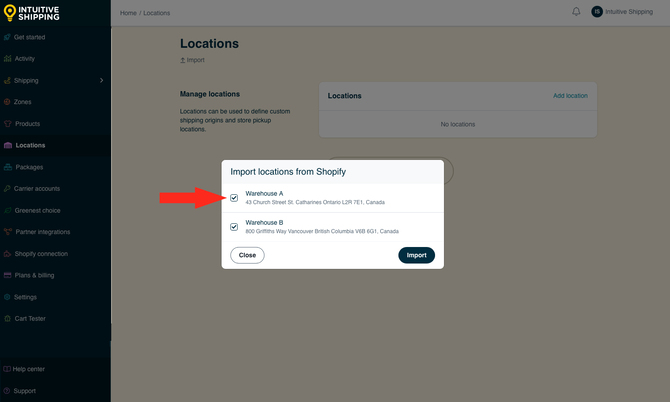
4. Click the Import button.
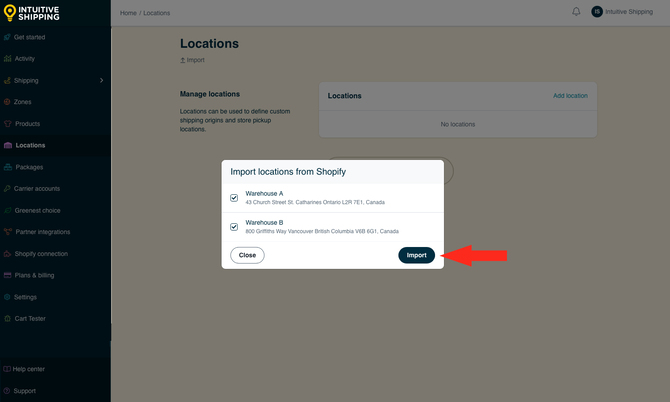
 If locations from your eCommerce platform are not available for selection, try reimporting your platform's shop settings.
What's Next
Optional:
Can we lend a hand? Let us help you get up and running faster and with greater confidence. Book a complimentary Onboarding session!